napari-zelda#
ZELDA: a 3D Image Segmentation and Parent-Child relation plugin for microscopy image analysis in napari#
Rocco D’Antuono
Crick Advanced Light Microscopy STP, The Francis Crick Institute (London, UK)
This section is divided in 2 parts:
Introduction to napari-zelda
Article: Front. Comput. Sci., 04 January 2022 | https://doi.org/10.3389/fcomp.2021.796117
Demo of napari-zelda
Image Data: ZELDA 2D and 3D data sets
Installation instructions: RoccoDAnt/napari-zelda
napari GUI: Plugins -> Install/Uninstall Package(s)
use prepared environment: np-zelda.yml
conda env create -f np-zelda. yml
More on napari-zelda:#
Repository: RoccoDAnt/napari-zelda
ZELDA: a 3D Image Segmentation and Parent-Child relation plugin for microscopy image analysis in napari#
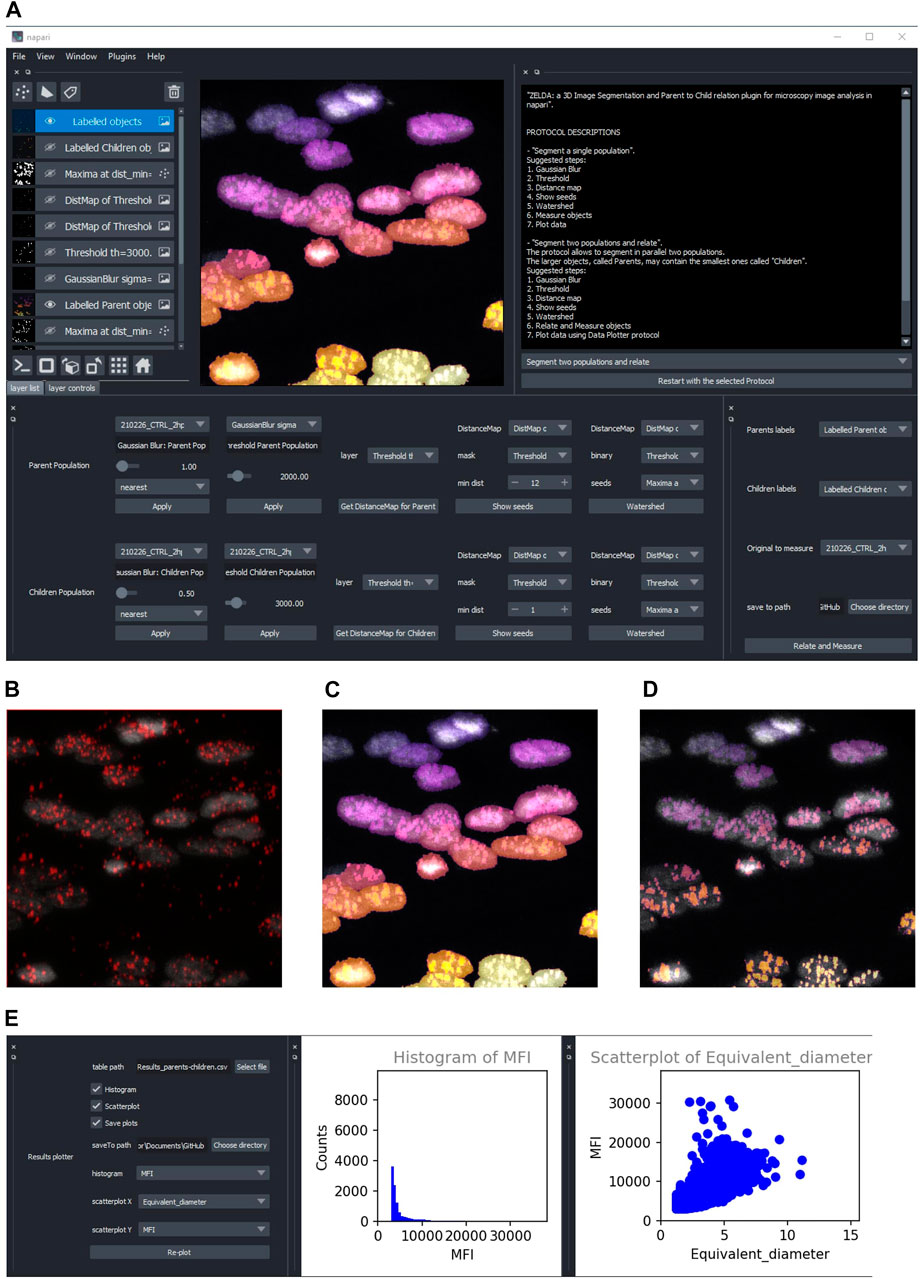
What you can do with ZELDA plugin for napari#
The plugin can be used to analyze 2D/3D image data sets.
Multidimensional images (each channel corresponding to a napari layer) can be used to:
Segment objects such as cells and organelles in 2D/3D.
Segment two populations in 2D/3D (e.g. cells and organelles, nuclei and nuclear spots, tissue structures and cells) establishing the “Parent-Child” relation: count how many mitochondria are contained in each cell, how many spots localize in every nucleus, how many cells are within a tissue compartment.
Example: cell cytoplasms (parent objects) and mitochondria (child objects)
|
|
|
|---|---|---|
|
|
|
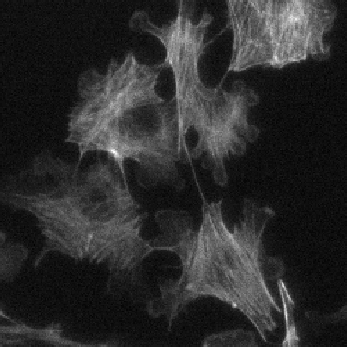
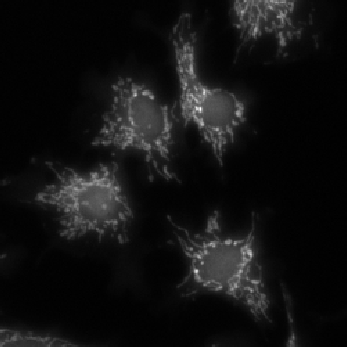
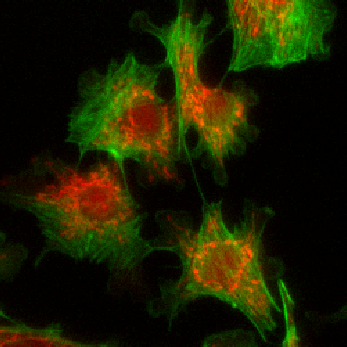
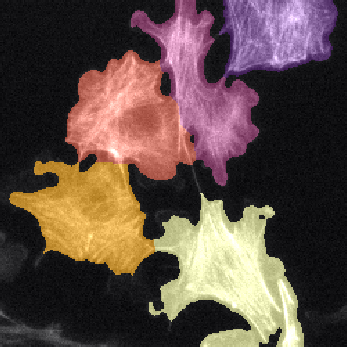
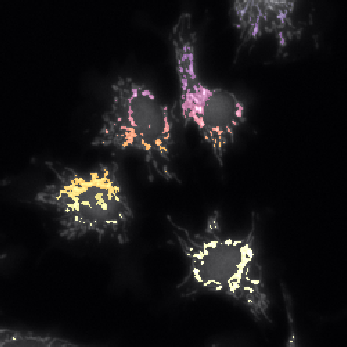
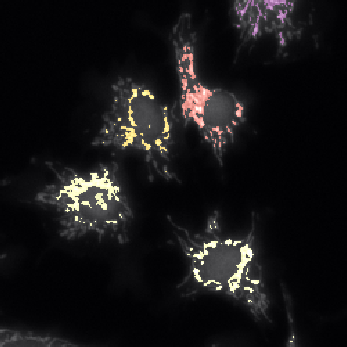
The images shown above are available in the docs folder of this repository and were segmented using ZELDA with the following parameters:
Parent objects |
GB: sigma=2.0-> Th_parents=60.0-> DistMap-> Maxima: min_dist=10 |
|---|---|
Children objects |
GB: sigma=0.3-> Th_children=450.0 -> DistMap-> Maxima: min_dist=2 |
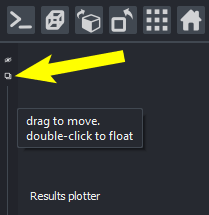
For small monitors it may be convenient to float the protocol panel
|
|---|
Plot results within napari interface.

Histogram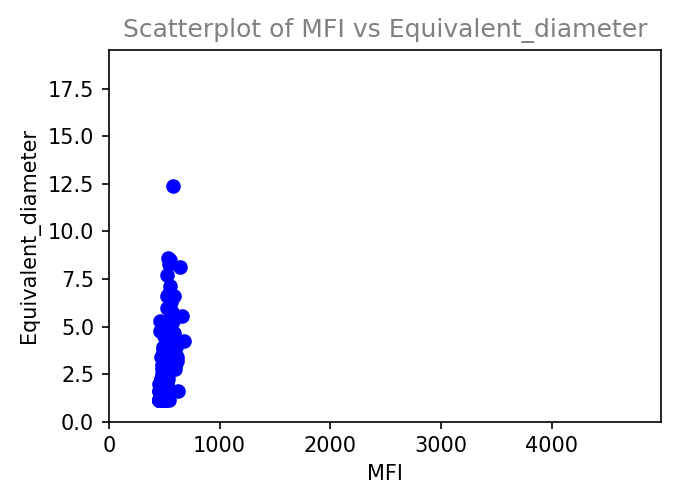
ScatterplotCustomize an image analysis workflow in graphical mode (no scripting knowledge required).
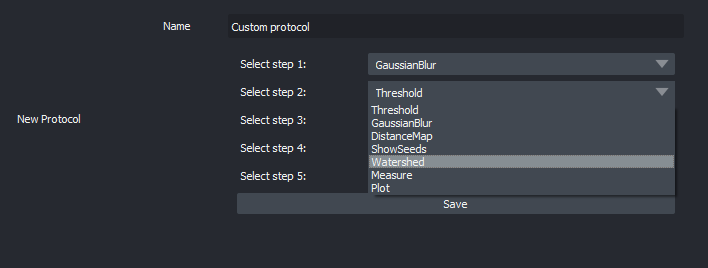
Custom image analysis workflowImport and Export Protocols (image analysis workflows) in graphical mode (share with the community!).
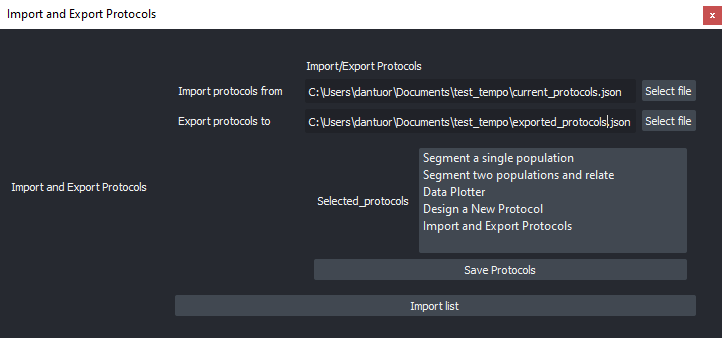
Import and Export of ZELDA Protocols
Installation#
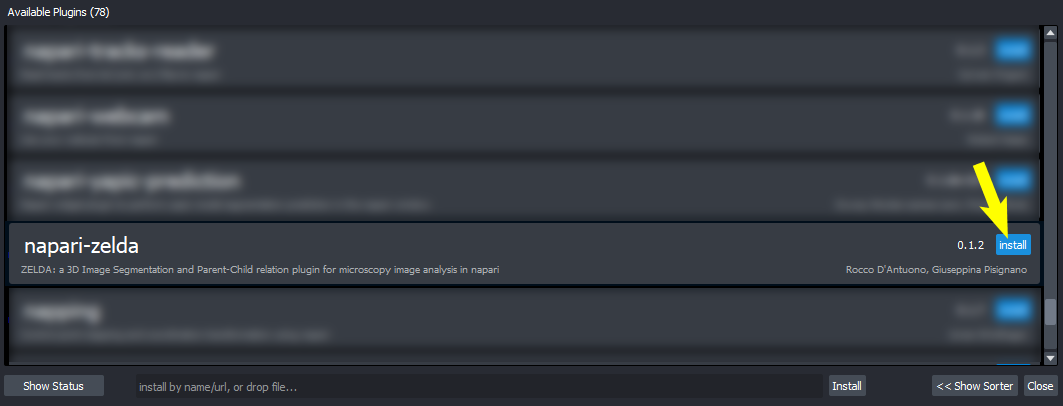
Option A. The easiest option is to use the napari interface to install ZELDA (make sure napari!=0.4.11):
Plugins / Install/Uninstall Package(s)
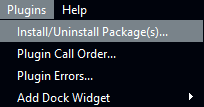
Choose ZELDA
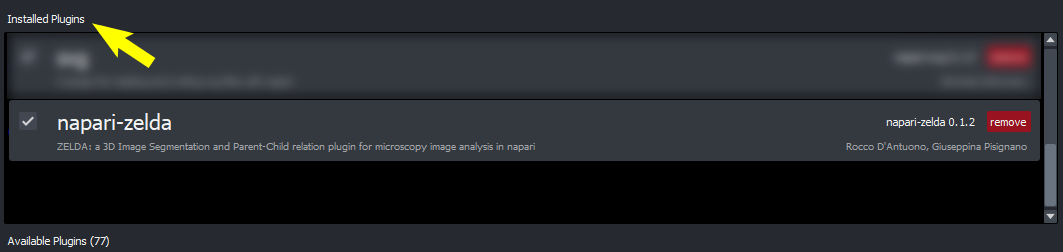
ZELDA is installed
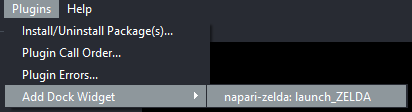
Launch ZELDA
Option B. You can install napari-zelda also via pip. For the best experience, create a conda environment and use napari!=0.4.11, using the following instructions:
conda create -y -n napari-env python=3.8
conda activate napari-env
conda install napari pyqt
pip install napari-zelda
Option C. Alternatively, clone the repository and install locally via pip:
pip install -e .
Option D. Get the latest code with git and pip:
conda create -y -n napari-env python=3.8 git
conda activate napari-env
conda install napari pyqt
pip install git+https://github.com/RoccoDAnt/napari-zelda.git
Specifications#
This napari plugin was generated with Cookiecutter using with @napari’s cookiecutter-napari-plugin template.
The GUI has been developed using magicgui widgets, while the image analysis and processing include functions from scikit-image, SciPy, and NumPy. Results are handled with pandas and datatable. Plots are obtained with matplotlib.
Contributing#
Contributions are welcome. Tests can be run with tox, please ensure the coverage at least stays the same before you submit a pull request.
Users can add new protocol steps to their local installation using magicgui widgets. Code can be added at the end of napari_zelda.py file:
###Add here new functionalities for ZELDA ###
###@magicgui(layout=”vertical”)
###def new_functionality_widget(viewer: ‘napari.Viewer’):
###…
#
###End###
License#
Distributed under the terms of the BSD-3 license, “napari-zelda” is free and open source software
Issues#
If you encounter any problems, please file an issue along with a detailed description.